
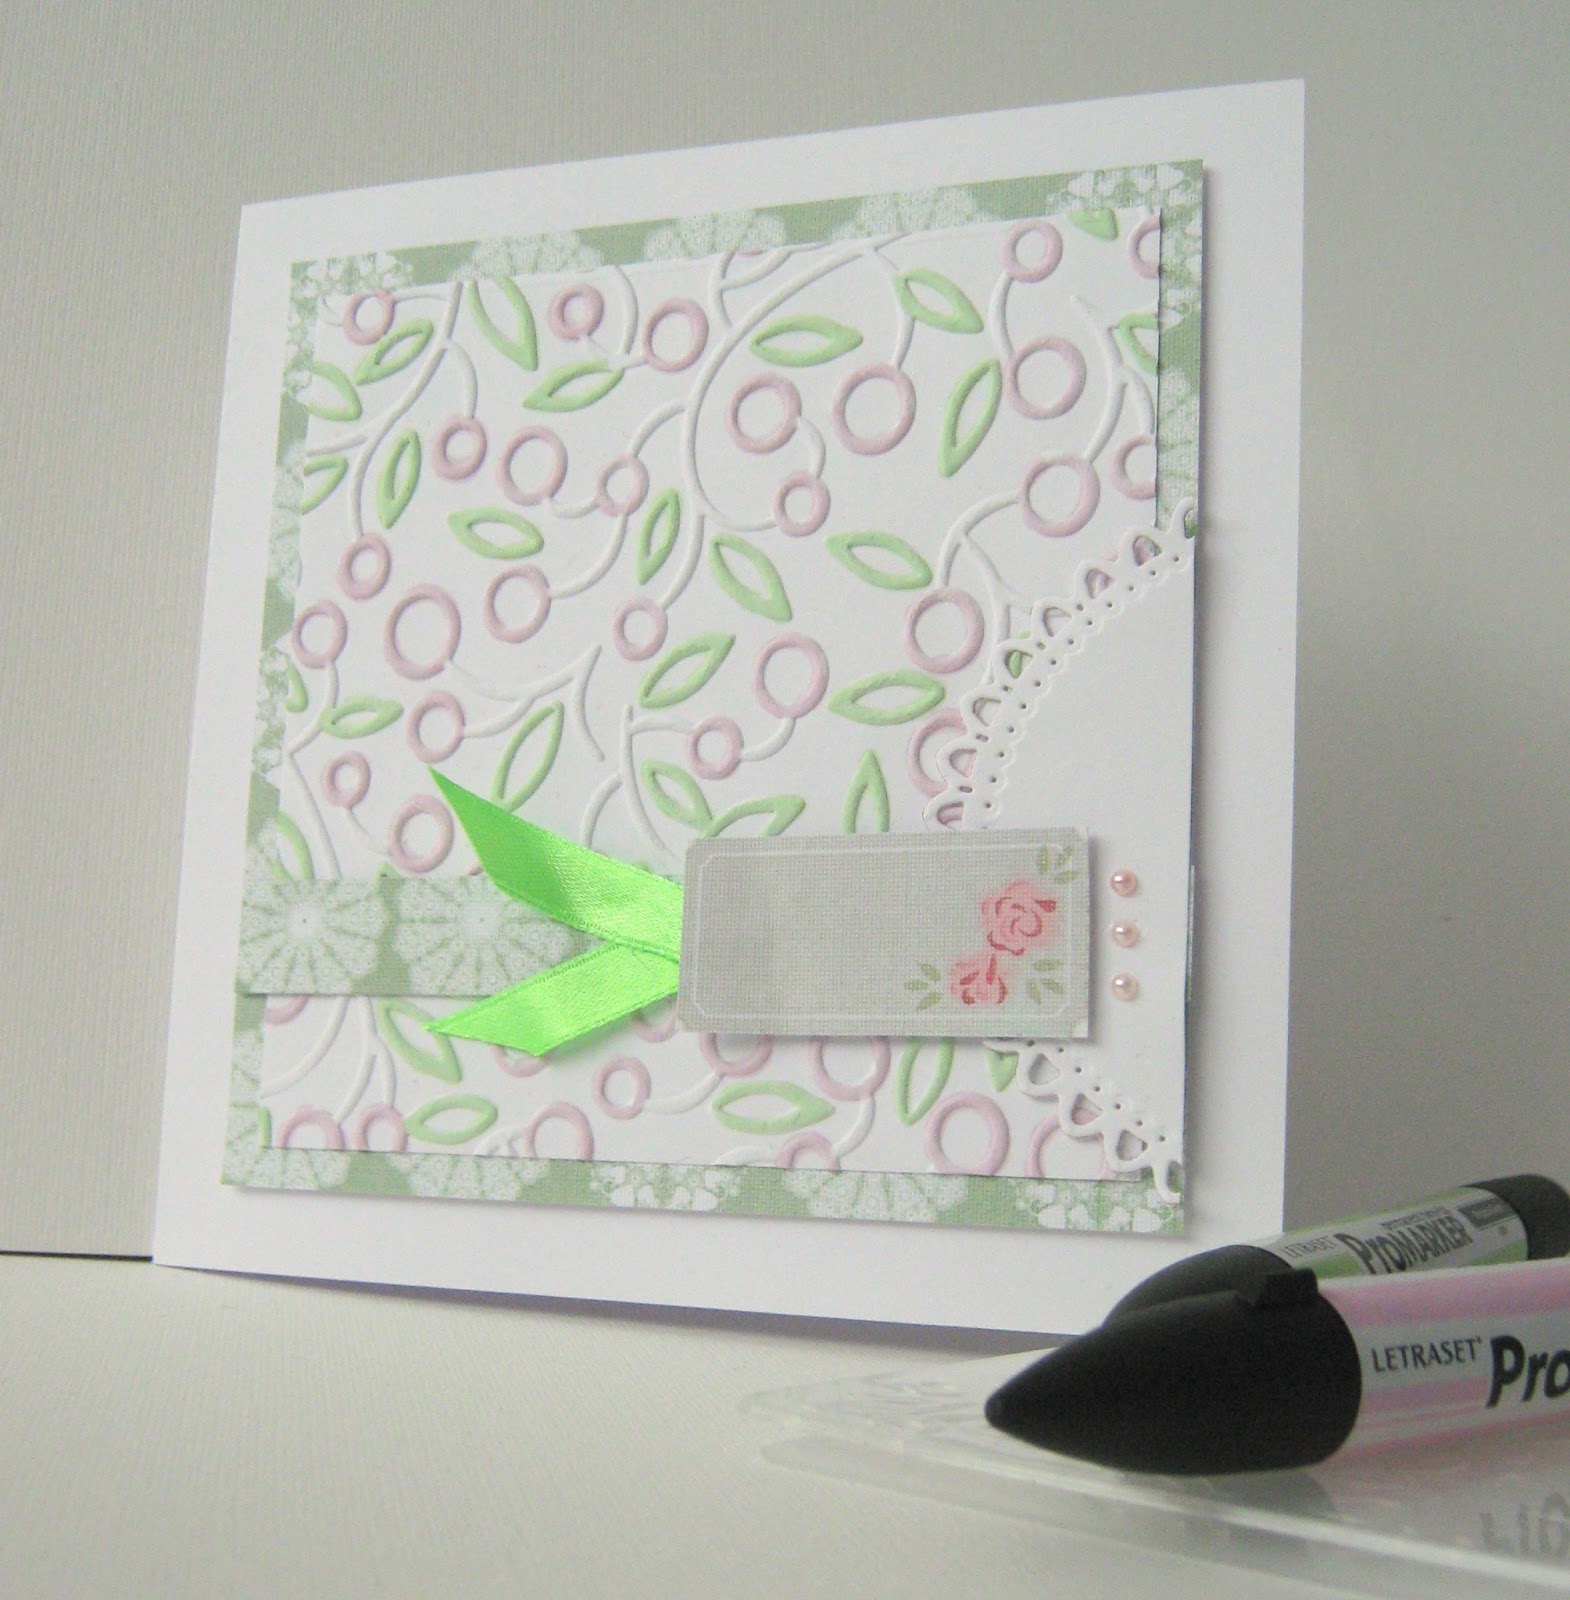
Colouring Embossing Technique
Cut a square of white card (11.5cm x 11.5cm)
Place in embossing folder (I have used Couture
Creations C0723153)and run through your die cutting machine


Take a light green Promarker (I have use Meadow
Green) and colour the leaves

Using a light pink Promarker (I have used
Blossom) and colour the ‘flowers.

And the finished peice will look like this

Take
peice of co-ordinating paper/card (I have used Docrafts Vintage Notes)
and cut 12.5cm x12.5cm
Cut a strip or the co-ordinating paper 1.5cm x
12.cm and stick to the lower section of your embossed design
Using an off cut of the white card from the
beginning, use a decrotive oval/circle die and cut a semi circle (I have used
the smallest die in the Spellbinder Grand Nestabilities Decorative Ovals set.
Then adhere the right end of the strip
Use foam pads to add a sentiment of your choice,
the decorate as desired.
When decorated, stick to a 6x6 card, using foam
pads
And here is the card I made with mine :)

Great idea and a lovely card using the embossing for the background.
ReplyDeleteHugs
Linda xxx
Really enjoyed this and your card is beautiful .x
ReplyDeleteThat's such a pretty card, and very neat colouring on the raised embossing......mine goes all over the place! Great tutorial x
ReplyDeleteGoing to give this a go
ReplyDeleteGoing to give this a go
ReplyDeleteI can't colour my embossing as neat as yours either! Great card idea.
ReplyDeletexx
Beautiful and thanks for sharing xx
ReplyDeleteWow thats brilliant xx
ReplyDeletegorgeous card, thanks for the tutorial x
ReplyDeleteFabulous idea and stunning card....thanks for sharing hun.
ReplyDeleteHugz, Lorraine xx
Wow! Thanks for sharing the technique! I'll try this someday
ReplyDeleteMaya xx
So simple but effective, thanks for sharing hun, will be having a go at that xxx
ReplyDeleteVery pretty card, I don't know how you've managed to not get the colour anywhere other than the raised bit, mine is never that neat xxx
ReplyDelete