Monday 19 September 2016

How to make a Upcycled Trinket Box

Hiya craft friends,

It's great making use of something that would normally be thrown away, and making it pretty...well that's a bonus! :)

Women of a certain age all know we all need a little help along the way, and most of use have our little pots of cream on our dresser. Well, how about making them into a useful little additions to the dresser when they are empty.

I've got a little soft spot for anything makeup and skincare and have tried lots of creams over the years. This was one of the cheaper ones I've tried, but when I had emptied it, it seemed a shame to throw away this particular one. So, I decided to upcycle it.


I was quite lucky that with just a little elbow grease and wet wipe I was able to remove the writing from the lid without marking the clear plastic.


The lid had an inlay that was easily removable, so I started by separating them.


My mum found this lovely tissue paper and gave me a few sheets. I love the butterflies on it.


I placed the top layer of the lid onto the tissue paper to decide which part of the design I wanted to use.


Once I decided on the best placement I then placed the bottom layer of the lid under the design. 


I then placed the top layer and began to slowly and gently push down so the tissue paper was being sandwiched between the two.


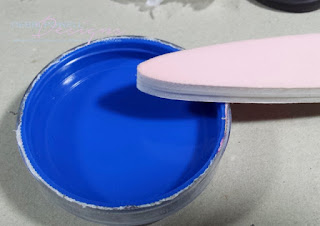
Once I pushed as much as it would go, I turned it over. The blue needed to be pushed a little more until it was flush with the clear layer.


The excess tissue paper was cut away...


...but this left a untidy edge.


To neaten this I used a nail file in light, small circular movements...


...which flattened and neatened  the edge


Thank you as always for stopping by

Happy craftng


Saturday 10 September 2016

How to make a Christmas Tealight

Hiya crafty friends,

Well, I am a bit behind with my Christmas crafting, but operation Christmas has now begun in earnest.

So, hopefully, in the next few weeks I'll be sharing my festive makes.

Late last year I got some great buys in the post Christmas sales and I've been dying to use them.

One of which was these packs of two mercury glass tealight holders, at the bargain price of...50p!!!! :-) I was planning from the beginning to make them festive, and as they were such a good price, I challenged myself to make the whole thing on a budget.


I love the look of these holders and got them in dusky pink, silver and red. I'll use the dusky pink for this tutorial.


I took some brown gingham ribbon (Bargain #2: which I got for £1 for 10m!!) and wrapped around to get the length I wanted.


To secure the ribbon I applied a dot of hot glue at the back and also where the ribbon crossed at the front.


I added some natural coloured twine, which is bargain #3. I got a very large amount for, I think it was, £1.99


After I trimmed the twine to length I gave it a little 'haircut', as it was a little bit hairy :) and this just neatened it up


To make them more festive I added some berry stamens, which I got from ebay (bargain #4) and I got 12 bouquets in total .  Each bouquets contains approx. 12 branches, so there was approx 144 branches in total for only £4.00. That's 3p a branch!!! And I've already used them on another project, which I will share soon. The fir I used was from a little 2ft Christmas tree that was in my loft and had never been used, so I took it apart.


I cut a short length off the end of a branch with some wire cutters and then cut a second, very slightly longer, from the same branch. As the top of this one was flat, I trimmed it to a point to match the other and make it look more natural


Using hot glue I added them to the top of the ribbon


I took one branch of the berries and snipped away the wire stem...


...and added to the centre of the firs.


I took apart another branch of berries, so I now had individual stamens...


...which I added amongst the greenery.


So here with have the finished item, and breaking all the supplies down to individual prices the grand total of the finished item was...you wont believe it...36p!!!!!


Right, you've guessed, I'm now in the Christmas crafting mood and off to plan some more festive fun.

Thanks for dropping by and hope to see you soon

Happy crafting

Debbi