Hiya crafty friends,

Welcome to my Clare Curds Crafts DT day. I can't believe it's my third project already!
This weeks project was was a bit of an experiment for me. I didn't have a clue if it would all work out in the end. Thankfully, it did :)
This weeks project was was a bit of an experiment for me. I didn't have a clue if it would all work out in the end. Thankfully, it did :)
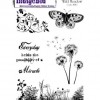
This month I have been shared three different projects using just one stamp set, the Indogo Blu - Wild Meadow set and some Tim Holtz Distress Inks.
Today, I am sharing how to do Watercolour stamping. A very simple but effective technique.

Step 1.
First I took the grasses stamp from the collection and placed it on a large stamping block.

Step 2.
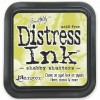
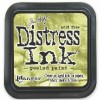
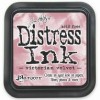
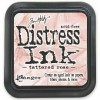
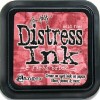
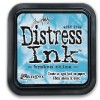
I used Shabby Shutter, Peeled Paint, Tattered Rose and Victorian Velvet, in the following way.

I applied the Shabby Shutter on the majority of the stamp, particulary where the stems , grasses and fern are.

Taking the Peeled Paint ink, I applied this to the bottom of the stamp and very slightly up the sides

Tattered Rose ink was then applied to the top of the stamp, particularly where the flowers are.

Then finally I added a small amount of Victorian Velvet to the very top of the stamp.


Step 3.
I lightly spritz the stamp with some water (hold the spritzer further away from the stamp than shown in the picture, as it will make it too wet).

I tested how the stamp would come out on a piece of copy paper first, to see if I liked the colours together etc.I also realised I used too much water. So I knew to use less next time.

Step 4.
After re-inking the stamp as above, as I like the effect, I stamped on to some hexagon cut outs


Step5.
For the sentiment, I repeated the same technique using the inks in the following order


Then I stamped it on to the remaining hexagons I had cut out.

Step 6.
I made a hexagon background, using the same size hexagons. But I set the cut as a perforation, rather than a solid line.

Step 7.
Taking the corresponding stamped hexagons, I began to stick them to my background. Some raised with foam pads and some glued flat.


Step 8.
I should have done this before I stuck on the stamped hexagons, but I only thought of it afterward...lol.I gave the background a wash of Broken China Distress ink mixed with water. Which allowed the stamped hexagons to stand out more.

Step 9.
I cut and piece of dusky blue card 16.2cm x 16.2cm and adhere the hexagon sheet to the centre of it.


Step 10.
I then adhere it to and 8 x 8 scalloped card, using two layers of foam tape


Step 11.
Using Cystal Effects, I added a bit of dimension to the flowers


Step 12.
I felt the card needed just a little extra, so I made a layered butterfly using the stamp from the set.
I used the same inking technique as I used earlier and stamped two, without re-inking after the first. So I had a lighter version too.


Layer the two butterflies together, the lighter of the two at the bottom, by just applying adhesive to the centre, so the wings of the top butterfly can be raised slightly. I then placed it in the top left corner of the card


See you next Wednesday!