Tuesday 26 April 2011

Free digi stamps

This is the first time I have ever made a digi stamp and thought I'd put them on here as a freebie...enjoy :)

PNG


Sunday 24 April 2011

Easter Labels

Just a quick one...here's one of the labels I made for my Easter gifts (chocolate...yum, yum)


Happy Easter


Light tent continued...

Everything is bought for my light tent...watch this space :)

Friday 22 April 2011

Paper flower tutorial #1

Paper flowers.

Welcome to my very first tutorial. 

I am loving making paper flowers to add to my cards, at the moment, and this is one of my favourites. 

This is just how to make the basic flower, but they look even more lovely when you add you own style by inking, glittering or what ever you like to go with you card.


 Cut 4 large flower shapes, and 4 small flower shapes using a die cutter or punch etc. Place the larger petal shapes in one stack, then place the smaller petal shapes in a separate pile. 


2.       Take the pile of large flower shapes and cut between each ‘petal’ (don’t cut completely to the centre). Repeat the procedure with the smaller flower shapes.


3.       Take your sponge mat, and your ‘embossing tool’


4.       Place one of the larger flower cut outs on the sponge mat, and with your embossing tool, work in a small circular movement on ‘one’ of the petals. Miss the next petal, then repeat until you have gone all the way round.


5.       Turn your flower shape over and repeat with the un-embossed petals. Repeat steps 4 and 5 with all the larger flower shapes


6.      
Repeat steps 4 and 5 with all the smaller flower shapes, (you may need a smaller ‘embossing tool’ for this)


7.       Take the embossed larger flower shapes and pile them on top of each other. Gluing each layer with a spot of PVA glue in the centre of each flower.

8.       Continue the same process, (on top of the larger flowers), with the smaller flowers shapes.


9. Now that the flower is all glued together, place a tool in the centre, and fluff up the flower until you are happy with it.

10.   Finished flower...

Hope you enjoyed my first tutorial. I would love to see some of your flower creations

Happy crafting


Wednesday 20 April 2011

Having a go at a bit of DIY...

I decided today that I am going to have a go at making my own light tent, so I can take better pictures of my cards. I got the idea of a light tent from Becca over on Amazing Paper Grace, but have decided to have a go at making it myself. As you will learn in time, if I can do something in a more frugal way, I definitely will...lol! :)

I will keep you updated on my progress and, fingers crossed, share some better pictures


Tuesday 19 April 2011

Wings of nature card swap - Card # 2


Theme: Wings of Nature (birds, butterflies, bees etc)  
Colours: Green, blue and yellow

As I mentioned in my last post, I am taking part in my first card swap and was really stuck for ideas. As I was readying my other card  for the post an ideas popped into my head, and you know, when creativity strikes you have to follow...lol! It was all a bit of a rush job but I did manage to finish it and will be mailing it in the next couple of days. Phew.....what a stressful first card swap. No I'm only joking, and I'm really looking forward to participating in more in the future with the lovely Dawn.


Happy Crafting

Sunday 17 April 2011

My first swap card...continued

Why is it your head can be full of ideas most of the time, but when you come to sit down to make something like this, your minds a blank? Well, that's what happen to me...

I found out about this card swap from Facebook and got in contact with the lovely lady who is running it. As this was the first time I had done anything like this, I wasn't sure how it worked, but everything was explained and I set to work...well...that was the plan anyway.

The theme was 'Wings of nature' (birds, butterflies, bee etc) using the colours green, yellow and blue. I got to work on my card, trying this, trying that, but it just got to the point where I didn't like it at all. So that one went out of the window.

My second attempt seemed to be working out better and was going along quite smoothly. I have managed to finish it, although I am not totally happy with it. Following a strict theme was harder than I thought, but I suppose I will get used to that the more I do it and I am also used to adding more dimension, but as it is being sent through the post, I had to keep it to a minimum. Anyway, enough talk. Here it is...eeek!


Sorry the pictures is a bit dark. I had trouble photographing this one for some reason.

Happy Crafting


Sunday 10 April 2011

Very first card swap...

It has been  lovely weather here today, which called for a trip to the craft shop :) And of course a couple of little goodies had to be had :)

I have started my card (which may turn into cards :) ) to be included in my very first card swap...eeek...nervous. I hope whom every gets it, likes it :/ I will post pictures in the nexts few days.

I'm also going to be visiting other cardmakers blogs, as I keep come across things, like 'Blog Hops' etc, and because I am new to all thing I am not sure what they are or how they work, but would like to become involved with the crafting community out there.

Happy crafting

Monday 4 April 2011

Mother's Day...

Just a quck one this time...

This card is my attempt at Splitcoaststampers tutorial for a Quilted Card
It was quite fidderly, with all the small squares of paper (and cutting all the same size was a nightmare!), but enjoyable to do.


What's new pussy cat...?

As soon as I saw these stamps I fell for them. And what made it even better...they were FREE!!!!! WooHoo! We all love a bargain, don't we?

I love them all, but the cat in the wellies…awwww…I had to use that one first :)
So here goes, my first blogged card….ooowwwww, nervous :/

 Pretty in pink

I want a pair of wellies like that :)

I have just started  having a go at making paper flowers :)

Supplies:
Stamp - Free with ‘Cardmaking and Papercraft’ magazine (issue 90)
Cat - Promarkers
Body – (Ivory, Dusky Pink),  Ears – (Cocktail Pink), Wellies – (Pastel Pink, Dusky Rose, Cool Grey 1), Watering Can – (Lavender, Lilac, Amethyst), Butterfly – (Pastel Pink, Cocktail Pink, Dusky Rose)
Whole cat outline – (Gelly Roll Stardust Pen-Clear Glitter Sparkle)
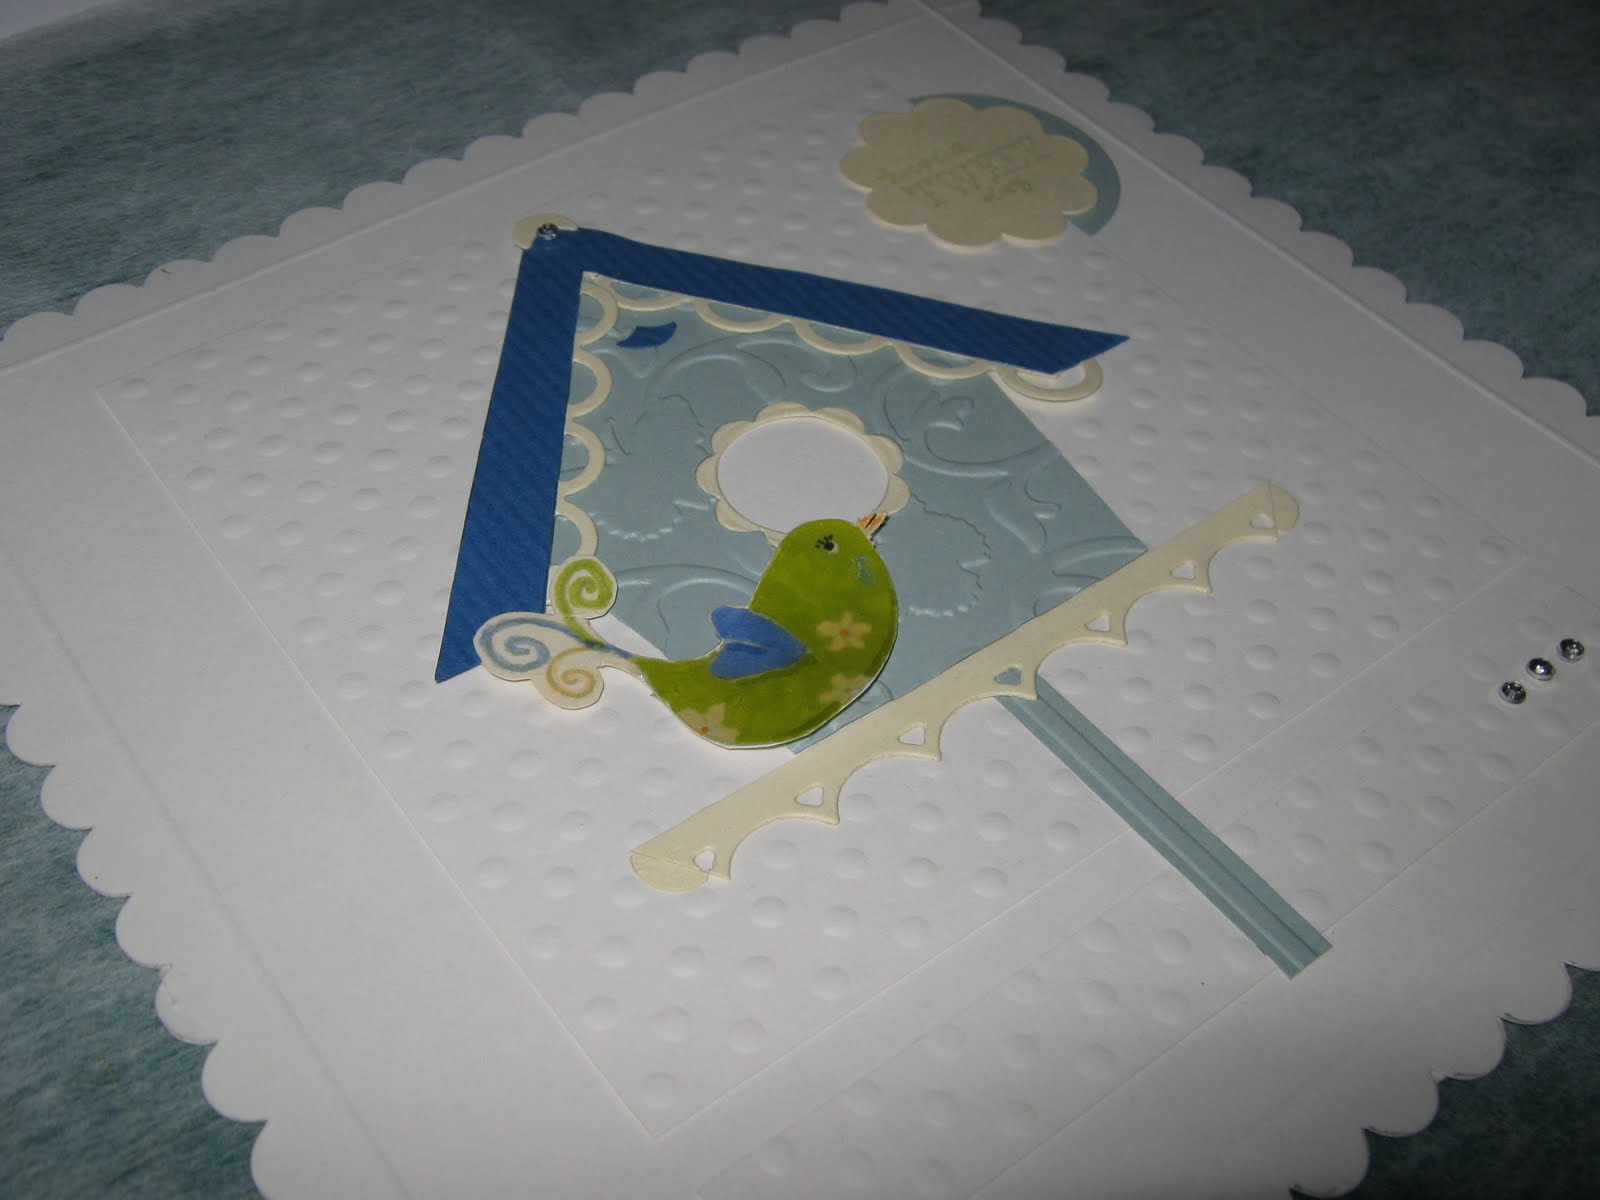
Card – white cardstock embossed with ‘Craft Concept-In Stitches‘ embossing folder and edged with ‘Victorian Velvet Distress Ink
Frame - Nellie Snellen Multi Frame circle dies (the largest of the set), edged with ‘Victorian Velvet Distress Ink‘ and sponged with ‘G Studio‘ pink ink
Sentiment - ‘Lili of the Valley‘ sentiments set, and punched with ‘X-cut‘ scallop circle punch. Card inked with ‘G Studio‘ pink ink’ and sentiment stamped with ‘Victorian Velvet Distress Ink
Border - Pink cardstock. Edge cut with ‘Nellie Snellen Border Dies’, pink gem stones and stitching is done with a white gel pen
Large Flower – ‘Nellie Snellen Incire Flower Die’, pink copy paper inked with ‘Victorian Velvet Distress Ink‘, punched leaves
Smaller flowers - Silk flowers and heart brad from my craft supplies
Well, there you go. I’m not a blog virgin anymore…phew! Post maybe slow at first, as I am still learning but I hope to post more often as I get more used to everything.
Thanks for looking